

1
/
of
1
AI6YM
FoxSniffer - Open Source Radio Direction Finder
Regular price
$199.00 USD
Regular price
$199.00 USD
Sale price
$199.00 USD
Quantity
Share
Features & Specifications
The FoxSniffer is an audible S-Meter for radio direction finding (RDF). Connect a directional antenna and swing it around. Higher frequency indicates stronger signal.
- Continuous tuning from 100 to 225MHz and 275 to 450MHz. Performance above
400MHz is not guaranteed. - Supports AM, FM, and unmodulated signals. Amateur signals, air band, and more - if it transmits in the supported frequency range FoxSniffer will help you find it.
- Automatic attenuation up to 126dB for locating strong and near transmitters.
- Built-in battery & USB-C charging.
- 8x2 character LCD display.
- Double-conversion heterdyne circuit into software defined receiver (SDR).
- RP2354 dual core processor (same IC as Raspberry Pi Pico 2).
- Fully open source hardware and software.
User Manual
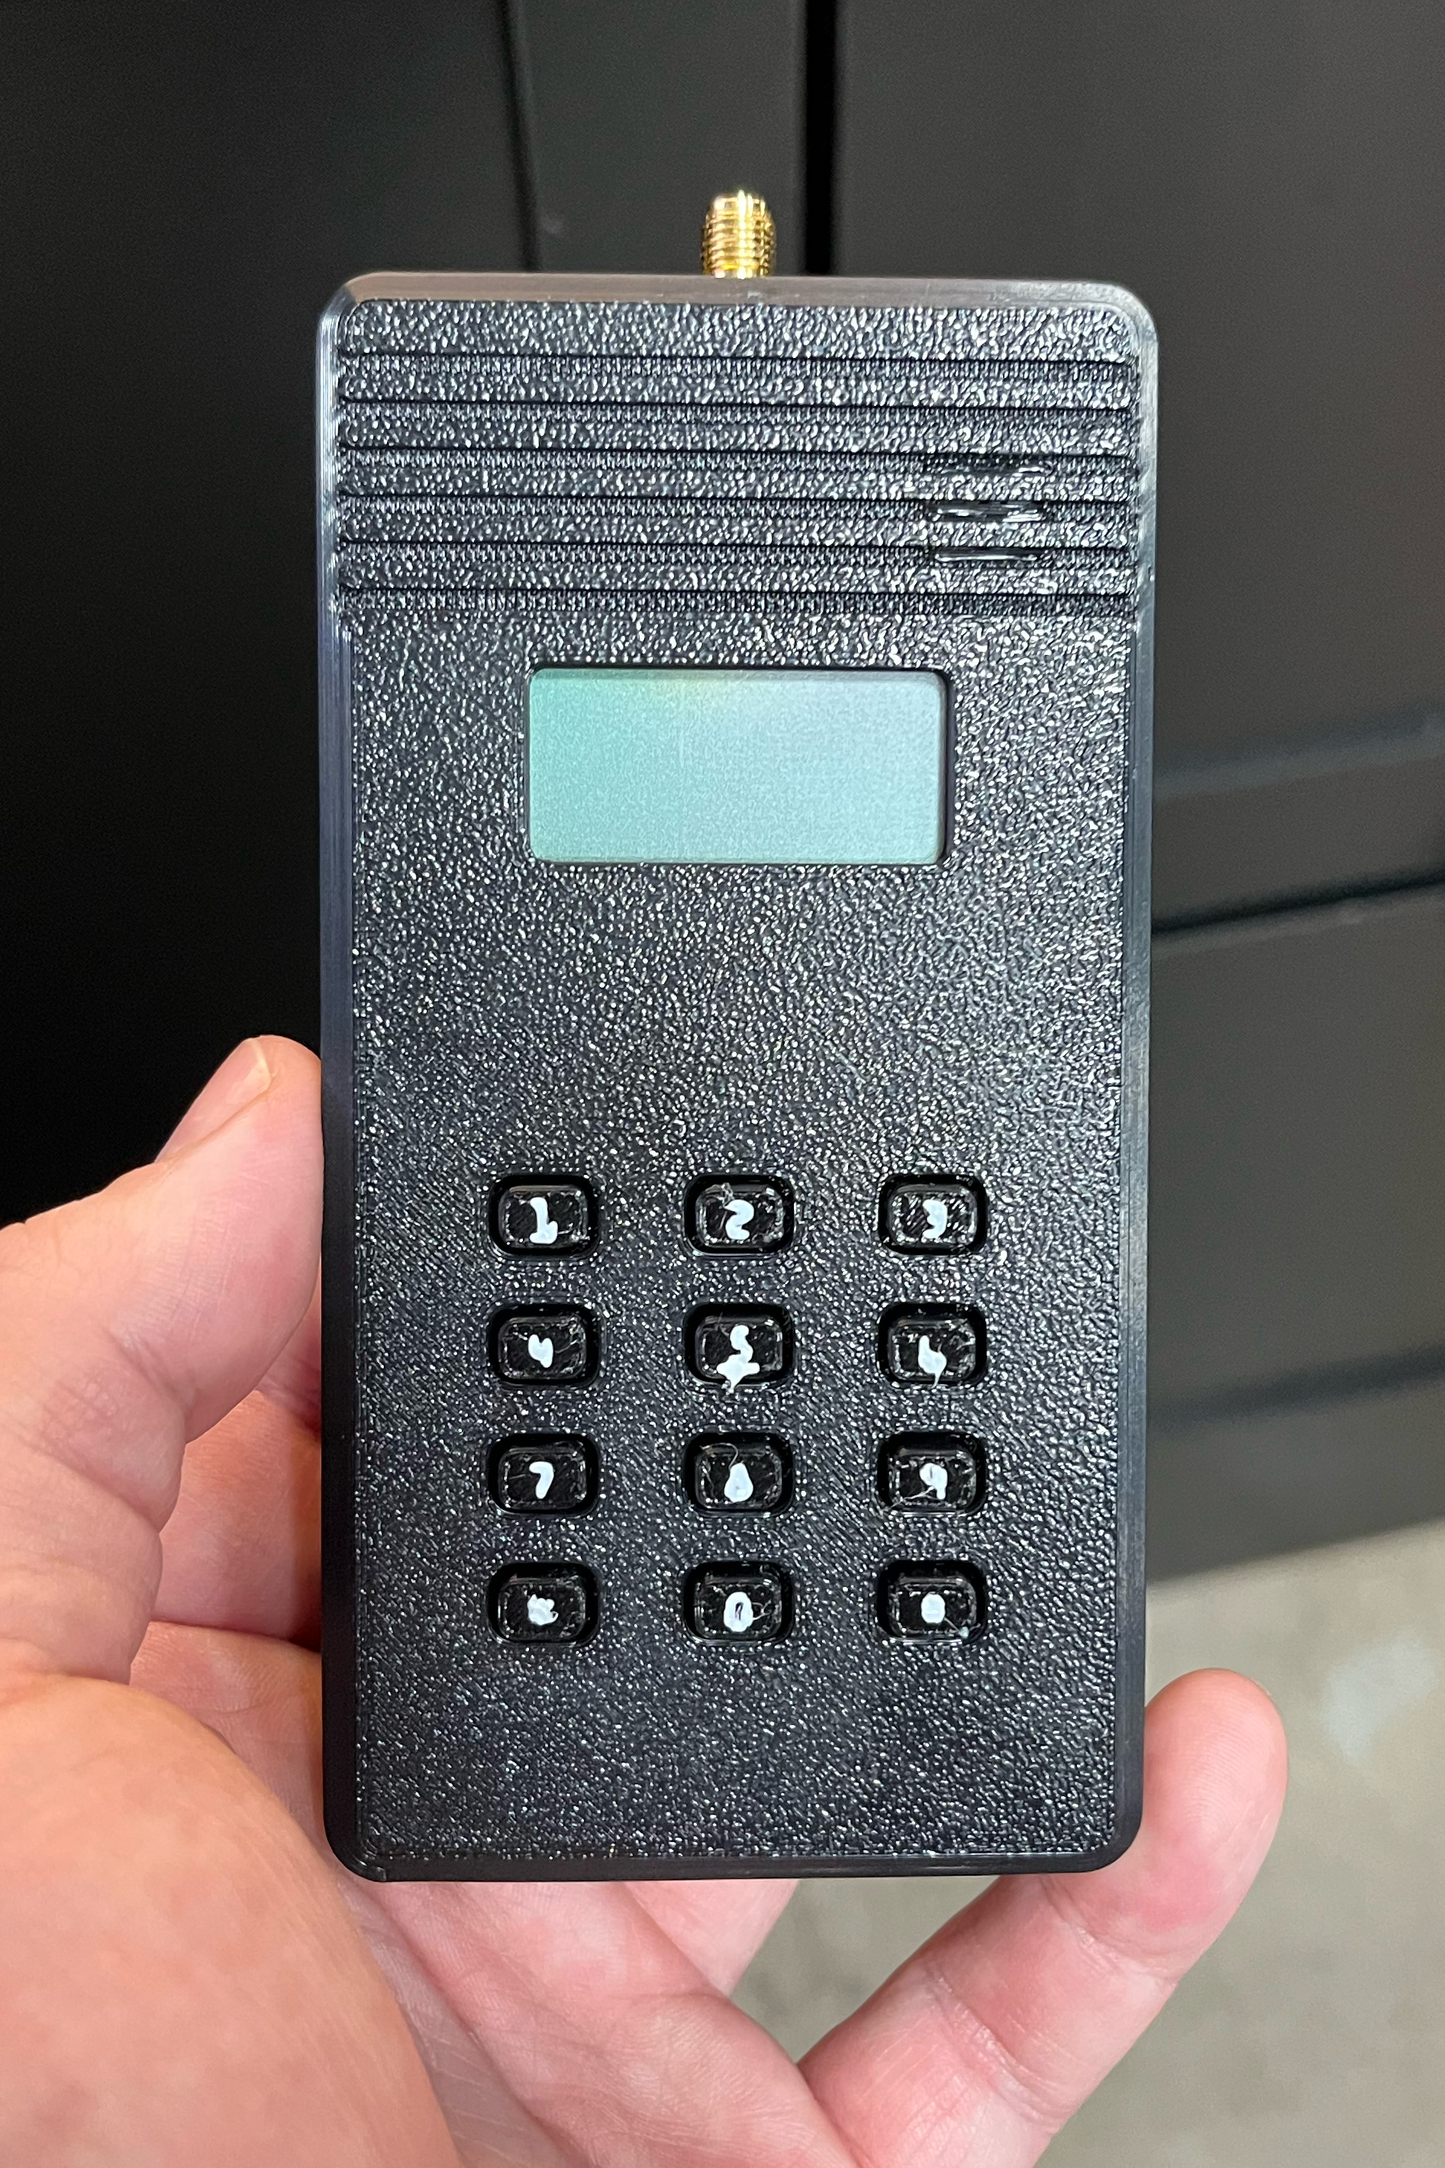
Inputs & Outputs
- Front: 8x2 character LCD screen, built-in speaker, 12-button panel.
- Back: Nothing. Probably.
- Top: SMA antenna connection.
- Left: Function wheel. `Up`/`Down` changes volume. Press `In` to enter the menu. The wheel's function can be changed in the menu.
- Right: 3.5mm stereo headphone jack (connecting headphones disables the built-in speaker).
- Bottom (left to right) charging LED, power LED, USB-C port, power switch.
Main Screen
The first line shows the tuned frequency (in MHz) when in frequency mode or the memory channel name in memory mode.
The second line shows the current attenuation level, the VFO (A/B), and a battery indication.
- Numeric buttons: enter frequency in kHz to tune (frequency mode) or a three-digit memory channel number (memory mode).
- Press `*` (left of `0`) to toggle between frequency and memory mode.
- Hold `*` to enter memory programming mode.
- Press `#` (right of `0`) to toggle VFOs, this is just a quick way to switch between two frequencies.
Memory Programming
Hold `*` to enter memory programming.
- The first available memory channel will be selected by default. When editing an existing memory channel the assigned number will be selected.
- Scroll `Up` and `Down` with the function wheel or enter a three digit channel number (`1` - `100`) to change the channel number, if desired.
- Press `In` to confirm the channel number selection and move on to naming.
Naming:
- Scroll `Up` and `Down` to move the cursor, each channel may have a name up to 8 characters.
- Use the number pad to enter a name. Letters are T9 (kids - ask ChatGPT), `0` rotates through symbols and blank.
- Press `In` to save.
Settings Menu
Press `In` to enter the menu. Scroll `Up` and `Down` through the available settings. Press `In` to select a setting and change its value. Hold `In` to exit the menu.
- `Volume`: selects the volume level from `0` (mute) to `10`. Note that volume level impacts battery life.
- `WheelFn`: selects the function of the wheel. Options are `Volume`, `Tune` (changes the frequency or memory channel), `Atten` (changes the attenuation level). Note: when `Atten` is selected the `AttnMode` option will be changed to `Manual`.
- `AttnMode`: selects how attenuation level is controlled. Options are `Auto` (attenuation is switched automatically), `UpOnly` (attenuation is added automatically but removed manually), `Manual` (attenuation is fully manual). Note: if `UpOnly` or `Manual` is selected `WheelFn` will be changed to `Manual`.
- `AttnDly`: selects the hold time before automatic attenuation changes.
- `Cntrst`: selects the LCD screen contrast level.
- `BkLight`: selects the LCD backlight intensity from `0` (off) to `5`.
- `BtnBeep`: controls whether beeps are played when buttons are pressed.
- `MaxTone`: sets the maximum frequency of the audible S-Meter.
- `TunStep`: selects the frequency step when the wheel function is Tune.
- `HrdRst`: Initiates a factory reset. See the Factory Reset flow below.
Factory Reset
To reset the settings and clear all programmed memory:
- Enter the menu (press `In`).
- Scroll to the `HrdRst` option and press `In` to select it.
- Scroll to the `Reset!` value and press `In` to select it.
- Hold `9` button until the device reboots. Note: if no input is received the reset process will time out without clearing the memory.
This process is not reversible.
Secrets
They wouldn't be secret if I told you, now would they?